 Pin It
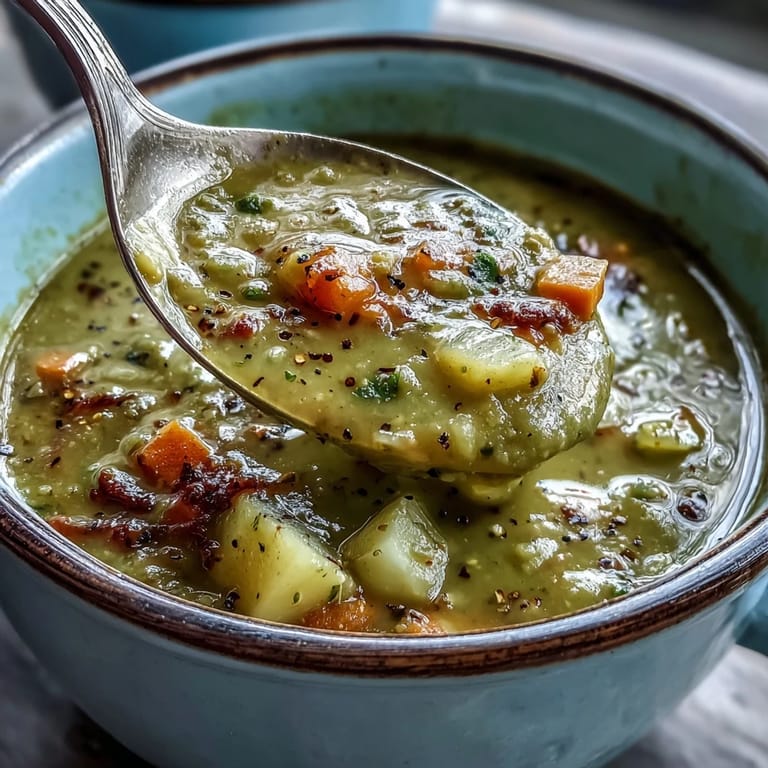
 There's something about the smell of split peas simmering on a cold afternoon that makes the whole kitchen feel like home. My neighbor handed me a container of her split pea soup years ago, and I was so impressed by how simple yet deeply satisfying it was that I immediately asked for her method. She laughed and said the secret wasn't in any fancy technique, just patience and good vegetables softening into the broth until everything became this velvety, golden comfort in a bowl. That soup got me through an entire winter, and now I make it whenever the temperature drops and I need something that feels like a warm hug.
I made this soup for my friend Marcus when he was stressed about finals, and watching him eat three bowls in one sitting told me everything I needed to know about its power. He kept saying it tasted like something his grandmother used to make, even though his family had never made split pea soup, which somehow felt like the highest compliment possible. Food has this strange way of reaching back through memory and time, even when you're experiencing it for what feels like the first time.
Ingredients
- Dried split green peas (2 cups): These little legumes are your soup's backbone, and rinsing them first removes any dust or debris that collected during storage.
- Onion, carrots, and celery (1 large, 2 carrots, 2 stalks): This trio of aromatics is called mirepoix, and together they create the flavor foundation that makes the soup taste like someone cared while making it.
- Garlic cloves (2, minced): Garlic cooked briefly becomes sweet and mellow, so don't skip this step or add it at the end—those first minutes of cooking matter.
- Potato (1 medium, diced): The potato adds body and helps create that creamy texture naturally as it breaks down.
- Vegetable or chicken broth (6 cups): This is your liquid foundation, so use something with actual flavor rather than the weakest option on the shelf.
- Bay leaf and dried thyme (1 and 1 teaspoon): These dried herbs whisper in the background, building complexity without shouting.
- Olive oil (1 tablespoon): Just enough to coat the pot and soften the vegetables without making the soup greasy.
- Smoked ham or ham bone (1 cup or 1 bone, optional): This adds that smoky depth that makes people ask what your secret is, though you can skip it for vegetarian or vegan versions.
- Salt and black pepper: Taste as you go, because broth salinity varies wildly between brands.
Tired of Takeout? 🥡
Get 10 meals you can make faster than delivery arrives. Seriously.
One email. No spam. Unsubscribe anytime.
Instructions
- Soften the vegetables:
- Heat the olive oil in your large pot over medium heat, then add the onion, carrots, and celery. You want them to turn soft and slightly translucent, which takes about 5 minutes—this is where the flavor foundation happens, so don't rush it. Stir occasionally and listen for that gentle sizzle that tells you things are cooking right.
- Wake up the garlic:
- Once the vegetables are softened, add your minced garlic and cook for just 1 minute until it becomes fragrant and stops being sharp. This short cooking time mellows the garlic without letting it burn or turn bitter.
- Build the soup:
- Add the rinsed split peas, diced potato, bay leaf, thyme, and broth all at once, along with ham or ham bone if you're using it. Stir everything together so the peas are submerged and nothing sticks to the bottom of the pot.
- Simmer low and slow:
- Bring everything to a boil first, then reduce the heat to low and cover the pot. Let it simmer for 1 hour, stirring occasionally to make sure nothing is sticking to the bottom, until the peas have completely softened and the broth has turned thick and creamy. You'll know it's done when you can easily smash a pea between your fingers.
- Remove solids:
- Fish out the bay leaf and ham bone (if used), and if you added diced ham, stir it back in now. This step is easy to forget, but that bay leaf hiding in the bottom of someone's bowl is never fun.
- Choose your texture:
- For a smoother, creamier soup, use an immersion blender to puree about half to three-quarters of the soup, or blend half of it in a blender and return it to the pot. You want some texture remaining so it still feels like soup, not baby food.
- Season to taste:
- Add salt and pepper gradually, tasting as you go, because different broths have different salt levels already built in. It should taste savory and rich, with the thyme and bay notes coming through gently.
 Pin It
 My mom once made this soup right after my dad had surgery, and he told me later that it was the first meal that actually made him feel like recovering was worth it. There's real power in a bowl of soup that says someone is thinking about you, that you're worth the time and care it takes to make something that nourishes you from the inside out.
Making It Your Own
Once you've made this soup a few times and it feels natural, you can start playing with variations that reflect what you have on hand or what you're craving. Some people add a splash of apple cider vinegar at the end to brighten it up, while others throw in extra vegetables like diced zucchini or green beans during the last 15 minutes. The foundation is solid enough to handle experimentation, so don't feel locked into the exact ingredient list once you understand how it works.
Vegan & Dietary Variations
If you're making this vegetarian or vegan, simply omit the ham entirely and use vegetable broth instead. For that smoky depth you'd normally get from ham, add a teaspoon of smoked paprika along with the thyme, or a pinch of liquid smoke if you have it. The soup loses nothing in translation—it just becomes a different kind of delicious.
Storing & Reheating
This soup keeps beautifully in the refrigerator for up to 4 days, and it actually improves as the flavors meld overnight. When you reheat it, the peas will have absorbed liquid and thickened even more, so add a splash of broth or water to get it back to the consistency you like. Freezing works too if you want to portion it into containers for those future cold afternoons when you need something warm fast.
- Leftover soup reheats gently on the stovetop better than the microwave, where it can heat unevenly and stick to the bottom.
- Let frozen soup thaw in the refrigerator overnight before reheating so the texture stays creamy instead of separating.
- A grind of fresh pepper and a crusty piece of bread turn any bowl of leftover soup into a complete meal.
 Pin It
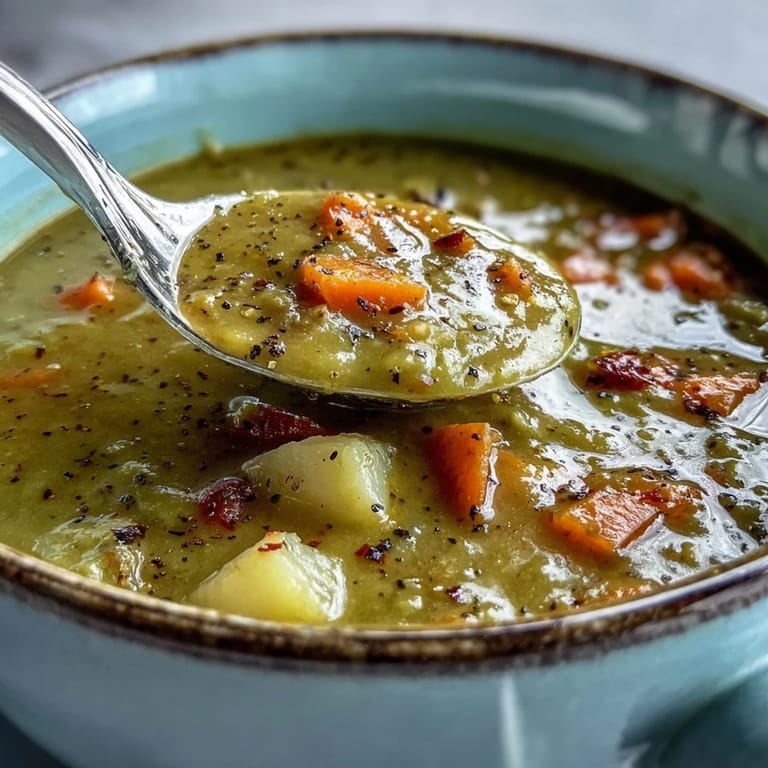
 There's a reason split pea soup shows up in kitchens across so many cultures and generations—it asks so little of you while giving back so much warmth and satisfaction. Make this for yourself, make it for someone you care about, and let it become part of your own cooking story.
Recipe FAQs
- → Do I need to soak split peas before cooking?
No soaking required. Split peas naturally break down during simmering, creating that signature thick texture without any pre-soaking steps.
- → Can I make this soup vegetarian?
Absolutely. Simply use vegetable broth instead of chicken broth and omit the ham. Add smoked paprika to maintain the smoky flavor profile.
- → How long does this soup keep in the refrigerator?
This soup stores beautifully for 4-5 days in an airtight container. The flavors actually deepen and improve over time, making it perfect for meal prep.
- → Why is my soup too thick?
Split peas continue absorbing liquid as they sit. Simply add more broth or water when reheating to reach your desired consistency.
- → Can I freeze this soup?
Yes, it freezes well for up to 3 months. Thaw overnight in the refrigerator and reheat with a splash of broth to restore texture.
- → What's the best way to puree the soup?
An immersion blender works perfectly right in the pot. For a smoother result, blend half in a standard blender and return to the pot for texture contrast.