 Pin It
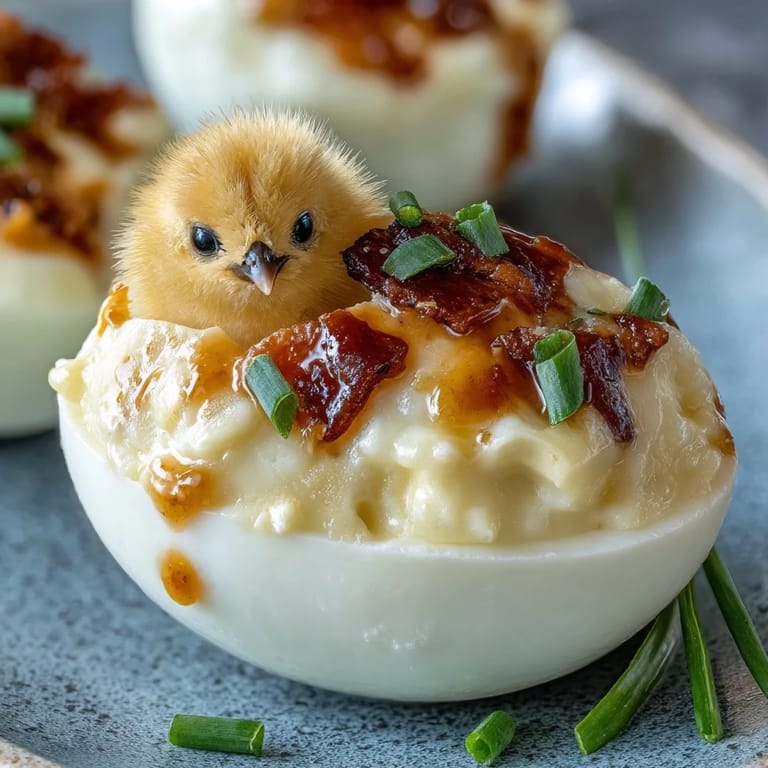
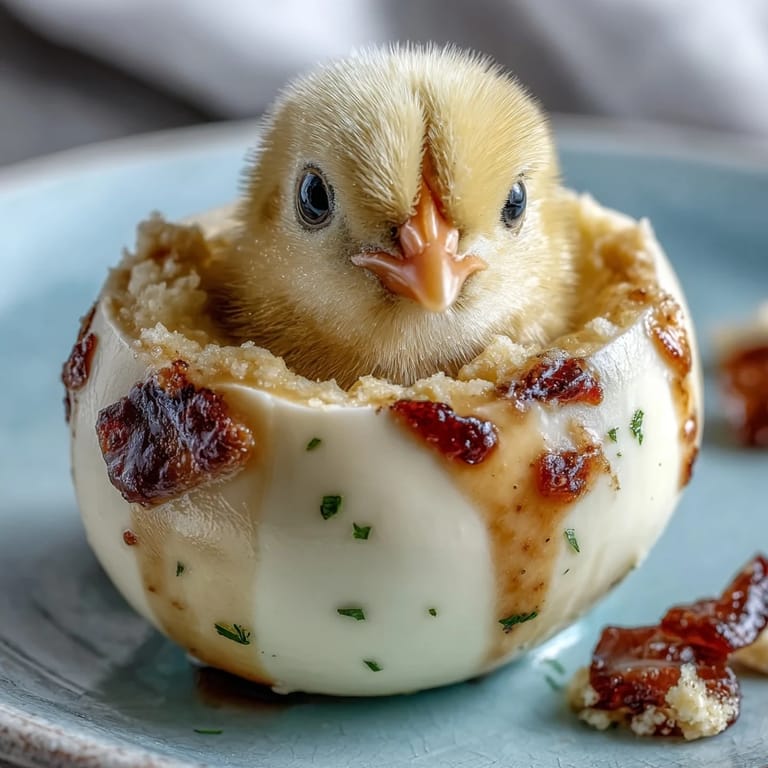
 My daughter came home from preschool one spring afternoon with paint-stained hands and a mission: she wanted to make something look like baby chickens. I laughed at first, imagining complicated sugar work, until she pointed at the deviled eggs in my fridge with the certainty only a four-year-old possesses. That afternoon, we transformed simple eggs into a dozen tiny chicks that made her squeal with delight, and honestly, they tasted so good that the adults kept sneaking them when she wasn't looking.
We made these for Easter brunch last year, and my nephew spent twenty minutes photographing each chick from different angles before eating a single one. His mom was torn between being annoyed at the delay and amazed that he cared so much about the presentation. By the end of the meal, every single chick had disappeared, and we were all laughing about how something so silly turned into the most memorable part of the day.
Ingredients
- Eggs (12 large): Room temperature or cold eggs work, but cold ones peel more cleanly—a trick I learned after ruining my first batch by peeling warm eggs that crumbled like chalk.
- Mayonnaise (3 tablespoons): The creamy base that holds everything together; use a good quality kind because you'll really taste it.
- Yellow mustard (1 teaspoon): Just enough to add a bright, tangy note without overpowering the eggs.
- White vinegar (1 teaspoon): Brings a subtle sharpness that makes the filling taste more complex than the simple ingredients suggest.
- Salt and black pepper (¼ teaspoon and ⅛ teaspoon): Season to your taste; I usually add a pinch more because the filling needs it to shine.
- Black peppercorns (24 whole): These become the chicks' eyes, and their perfect round shape is what sells the whole illusion.
- Carrot (1 medium): Cut into tiny triangles for beaks and thin slivers for feet; the bright orange is exactly the right touch of color.
- Fresh chives or parsley (optional): A little green tucked around the chicks makes them look like they're sitting in a nest, which is charming beyond reason.
Tired of Takeout? 🥡
Get 10 meals you can make faster than delivery arrives. Seriously.
One email. No spam. Unsubscribe anytime.
Instructions
- Boil and chill the eggs:
- Place eggs in a pot, cover with cold water, bring to a boil, then remove from heat and let them sit covered for exactly 10 minutes—this timing is what gives you that perfect creamy yolk with no green ring. Transfer them to ice water immediately and let them sit for at least 5 minutes so they cool all the way through.
- Peel with care:
- Gently crack the shell all over and roll the egg between your palms under cool running water; the water helps separate the shell from the white underneath. Peel from the wider end where the air pocket is, and be patient—rushing this step will cost you.
- Prep the egg shells:
- Slice a thin piece off the bottom of each egg so it stands on its own without wobbling. Then carefully slice off the top third of each egg horizontally, like you're opening a tiny treasure chest.
- Mix the filling:
- Mash the yolks with the mayo, mustard, vinegar, salt, and pepper until it's completely smooth and creamy; don't rush this or you'll have lumps. Taste it and adjust the seasonings because this is where all the flavor comes from.
- Fill the eggs:
- Spoon or pipe the yolk mixture into the bottom halves, mounding it slightly in the center to create the chick's head and body. The mound should be visible but not so tall that the cap won't sit on top.
- Create the hatching moment:
- Place the egg white cap back on at a slightly tilted angle as if the chick is just breaking through—the jaunty angle is what makes it actually look alive. This is where the magic happens and everyone will smile.
- Add the face and feet:
- Press two peppercorns into the filling for eyes, positioned where they'll look slightly surprised or mischievous. Cut tiny carrot triangles for beaks and thin slivers for feet, then gently press them into place.
- Final touches:
- Tuck a few chive or parsley pieces around the base if you're using them, which makes the whole tray look like a little green nest. Refrigerate until serving, which also gives the filling time to firm up slightly so everything holds together better.
 Pin It
 My friend texted me a photo of these on her daughter's lunch box with the caption 'She won't eat them because she named them all,' and I realized that this recipe does something special—it turns a simple appetizer into something that makes people happy in a way that goes beyond taste. Food that makes someone smile before they even take a bite is worth the few extra minutes it takes to cut some carrot and arrange some peppercorns.
Decoration Ideas That Actually Work
The carrot pieces are the star of the decoration show because they're bright, easy to cut, and they actually stick where you put them thanks to the sticky filling. But you can absolutely swap things around—I've used thin slices of black olive for softer, less crunchy eyes, and I've seen someone use tiny dots of mustard for eyes which looked surprisingly charming. The key is choosing things that contrast with the yellow filling so the chick's face actually reads from a distance.
Make-Ahead Magic
These can be made up to a day ahead, which means you can do all the annoying peeling and filling work when you have energy and patience, then just do the decoration decorating right before a party. I've found that the filling actually tastes better after it's had time to meld together in the fridge, and the whole thing is sturdier when it's been chilled.
Flavor Variations Worth Trying
The basic filling is tangy and creamy, but you can shift the entire mood by adjusting what goes into it. A pinch of smoked paprika makes them taste like something from a fancy brunch, while fresh dill or chives stirred into the filling gives them an herby brightness that's perfect in spring.
- Try Greek yogurt instead of mayo for a lighter, tangier filling that still holds together perfectly.
- Add a tiny pinch of cayenne pepper if you want a whisper of heat that adults will notice and kids will think is just regular spice.
- Stir in finely minced fresh herbs like tarragon or chives to make them taste gourmet without any extra effort.
 Pin It
 These little chicks are exactly the kind of recipe that reminds you why cooking for people matters—because sometimes it's not really about the food, it's about the moment of delight when someone sees what you've created. Make them, watch people smile, and let that be enough.
Recipe FAQs
- → How do I cook eggs perfectly for this dish?
Place eggs in a saucepan, cover with cold water, bring to a boil, then remove from heat and let stand covered for 10 minutes before cooling in ice water.
- → What is the best way to create the chick decorations?
Use carrot triangles for beaks and feet, and whole black peppercorns for eyes to give each egg a cute chick appearance.
- → Can I substitute any ingredients for dietary preferences?
Yes, swap mayonnaise with Greek yogurt for a lighter filling or use black olive pieces instead of peppercorns for softer eyes.
- → How should these be stored if made ahead?
Cover and refrigerate for up to one day to keep the filling fresh and decorations intact.
- → Are there tips to enhance the flavor of the filling?
Adding a pinch of paprika or chopped fresh herbs like parsley or chives can elevate the taste and presentation.